These homemade goldfish crackers are cheesy, crunchy, and amazingly addictive. They’re also pretty simple and fun to make, so it’s a fun activity to do with kids. You only need a few basic pantry ingredients, and you can cut them into any shape you’d like!
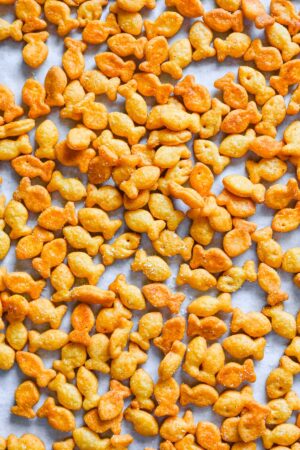
These goldfish really taste like the real thing, and they’re pretty easy to make: just mix together all of the ingredients, roll into a sheet, cut out your crackers and bake. The whole process takes an hour, and you’ll probably eat them all in about 5 minutes. They’re that good!
Why We Love This Recipe
- Better than store bought: Store-bought goldfish are pretty great, but imagine being able to eat them fresh out of the oven and still warm. These homemade goldfish deliver the same flavor and texture as the store bought version, except you’ll know everything that goes into them.
- They look amazing: With a goldfish cookie cutter, these really look like the real thing. You can also use a skewer and a teaspoon to create that characteristic eye and smile, but that’s totally optional.
- Pretty easy process: The hardest part is probably grating the cheese, which takes about 5 minutes. After that, all it takes is a food processor, a little kneading, some rolling, cutting out the crackers, and baking.
Ingredients
Here’s what you’ll need to make these homemade goldfish:
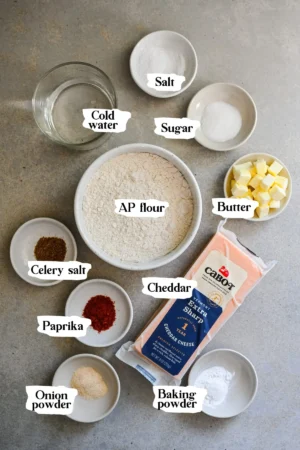
Ingredient Notes
- Cheddar cheese: The sharper the cheese you use, the more cheese flavor you’ll have in your finished crackers. We used an extra sharp cheddar that was aged for a year.
- Salt: Be sure to use kosher salt in this recipe to ensure accurate salt levels.
- Baking powder: Baking powder provides a bit of extra puff and rise for these crackers, so don’t leave it out.
- Spices: We used celery salt, paprika, and onion powder, which are the spices used in the official product. You can leave these out if you want a more neutral, cheesy cracker.
- Flour: We used regular all purpose flour. We have not tried this recipe with gluten free flour.
Step-by-step Instructions
STEP 1: Preheat oven to 350˚F, then shred your cheese with a cheese grater and add to a food processor. Process until cheese becomes small, round pieces.
STEP 2: Add in flour, salt, sugar, baking powder, paprika, celery salt, and onion powder and pulse until evenly incorporated.
STEP 3: Add in butter and pulse until butter chunks become roughly the same size as the cheese pieces. Pulse in the cold water.
STEP 4: Move dough to a work surface and knead until it forms a dough that sticks together. If it’s still crumbly, add water in small increments until it comes together. Divide dough in half and shape into two 1″ thick discs. Move to the fridge and chill for 30 minutes to an hour.
STEP 5: On a floured work surface, roll out each dough disc into a roughly 9-10″ by 11″ rectangle. It should be about ⅛” thick. Use your cookie cutter to cut the goldfish, and move to a parchment-lined baking sheet and sprinkle with salt.
STEP 6: Bake for 14-16 minutes, until bottoms are slightly browned.
Tips and FAQs
- Add the goldfish face: For the eye, just stick a skewer or fork tine all the way through the cracker. To make the famous smile, press the edge of a teaspoon-sized measuring spoon (or a small regular spoon) into the cracker. It’ll take a few tries to get it right, but once you get the hang of it, you’ll have a bunch of smiling goldfish.
- Baking time: Ours took about 16 minutes to bake. They’ll be done when the bottoms are slightly browned. You want to make sure you don’t take them out when the bottoms are still pale, because they just won’t be crunchy.
- Sprinkle with salt before baking: This step is easy to forget, but it adds a lot of flavor. Don’t forget it!
- No goldfish cookie cutter? No problem. Use a bottle cap to cut these into round oyster-style crackers. Alternatively, you can cut them into squares (like our cheez–its) or any other shape.
- Chill the dough: This makes it easier to work with, roll out, and cut out your crackers.
- Flour your work surface: This will prevent the dough from sticking to your work surface and your rolling pin.